Quantcast
Channel: Control Panel – IPSERVERONE
Viewing all 144 articles
Browse latest View live

How to setup DKIM using DirectAdmin

$
0
0

Step 1 – update DirectAdmin

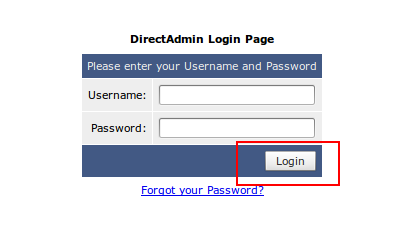
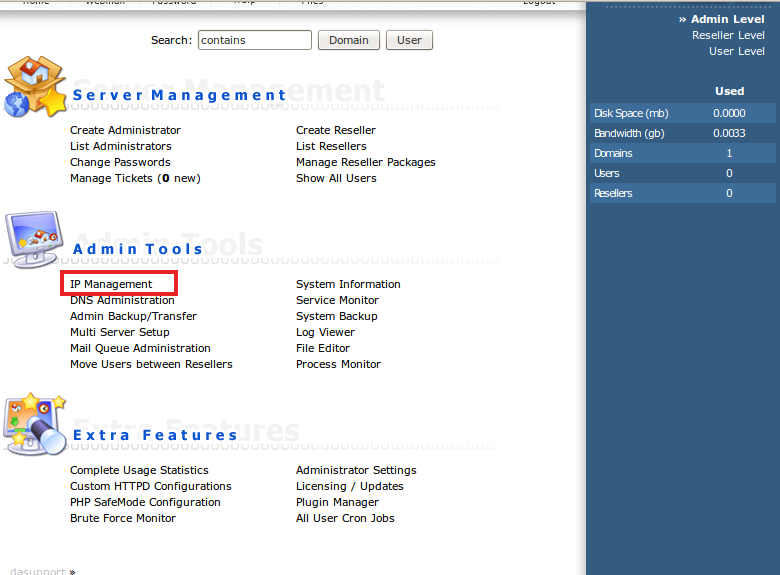
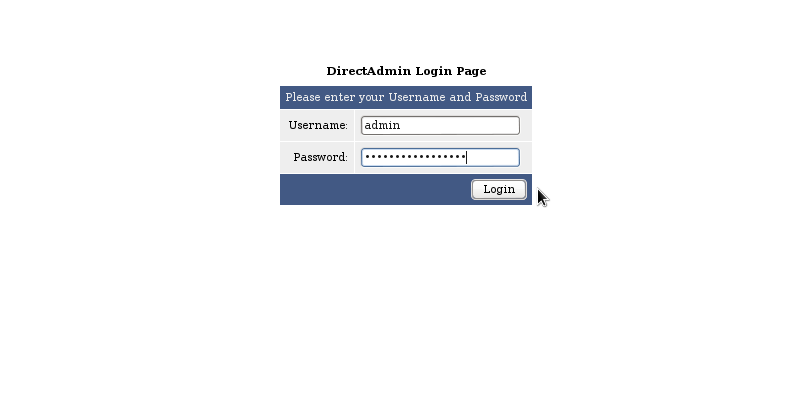
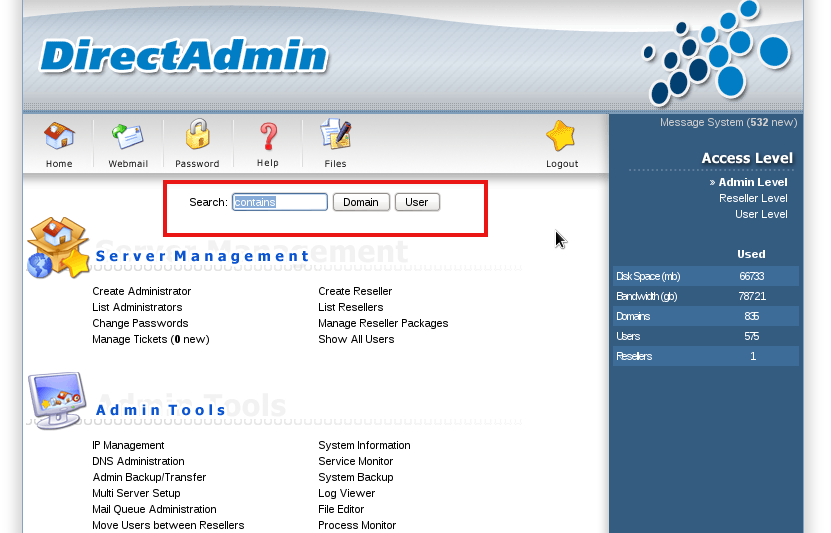
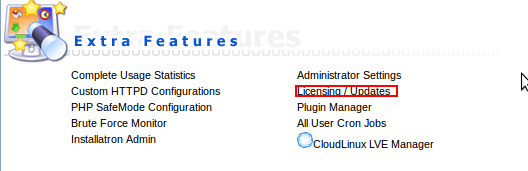
Before you can setup DKIM records for your domains you need to update your DirectAdmin to the latest version. This can be done by logging in to your DirectAdmin as an admin user and entering “Licensing / Updates” section, see the image below:

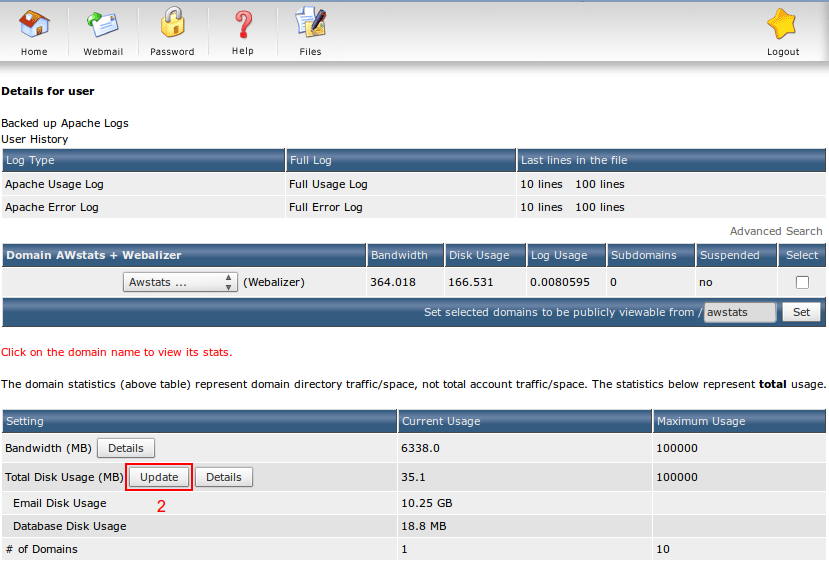
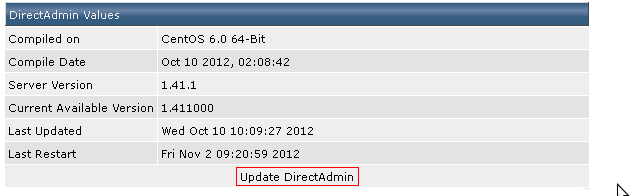
After that click “Update DirectAdmin” button at the bottom of the page, see the image below:

Configure directAdmin in linux to support DKIM

First you will have to edit “directadmin.conf” file and add line “dkim=1″.

go to directory

 vi /usr/local/directadmin/conf/directadmin.conf <---- add  this line above

Step 3 – enable DKIM record set for domains

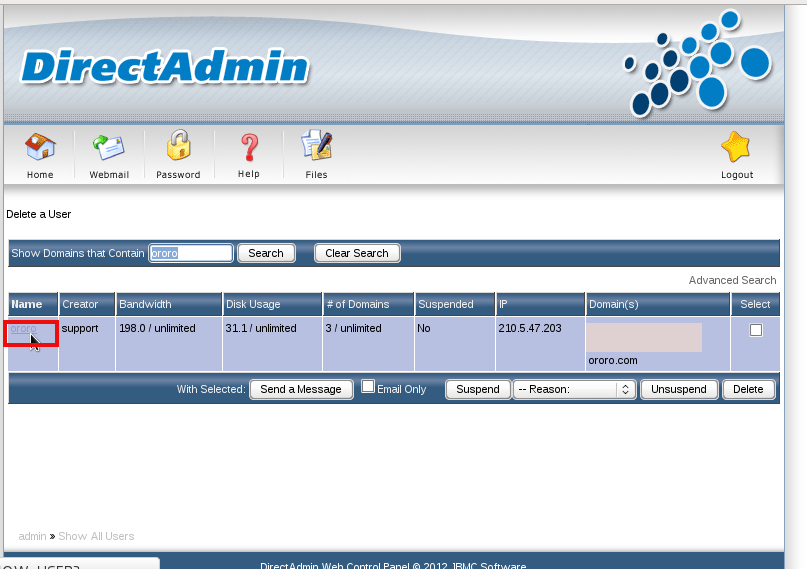
To setup DKIM record for each new domain you need to ensure it is active domain

Run the following command

 cd /usr/local/directadmin/scripts - enter the directory where DirectAdmin scripts are located 
./dkim_create.sh domainame.com - run the DKIM record creation script for the existing domain

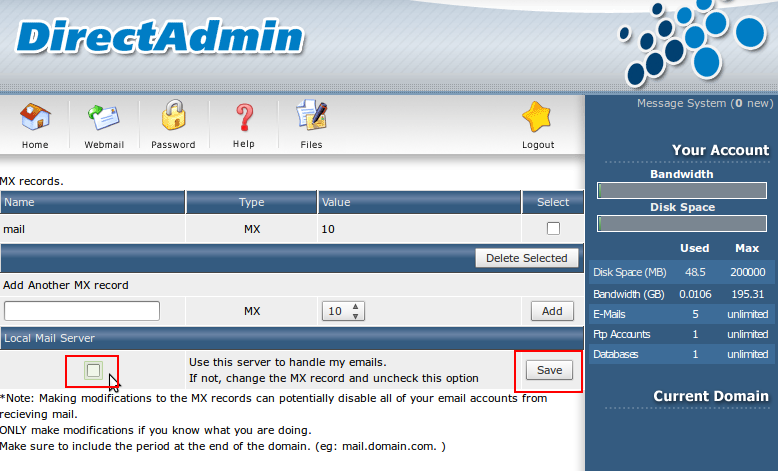
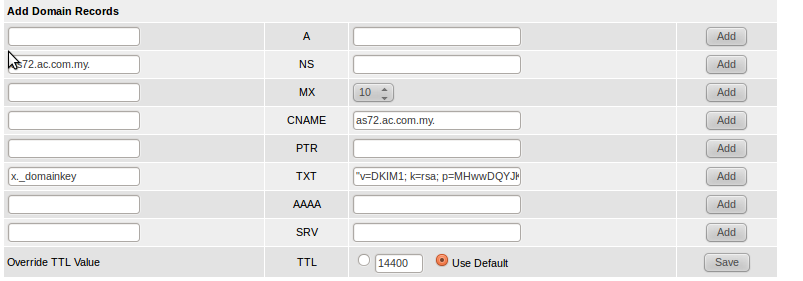
After running the script DirectAdmin will automatically add DKIM records for all new domains. DKIM records can be found in your DirectAdmins users DNS Management section, see the image below:

The record itself should look something like this:

Step 4 – edit your exim configurations

Note: For shared hosting does not need to follow the step 4

First go to file

 /etc/exim.conf

After that find the line that contains text “remote_smtp” and add following information:

*********************************************************************************
remote_smtp:
  <p> driver = smtp </p>
  <p> dkim_domain = $sender_address_domain </p>
 <p> dkim_selector = x </p>
 <p>  dkim_private_key = ${if exists{/etc/virtual/$sender_address_domain/dkim.private.key}{/etc/virtual/$sender_address_domain/dkim.private.key}{0}} </p>
 <p>  dkim_canon = relaxed </p>
  <p> dkim_strict = 0 </p>
***********************************************************************************

The data in the file should look something like this:

Save the file and restart exim using following command:

    service exim restart
Step 5: Add dkim in a record

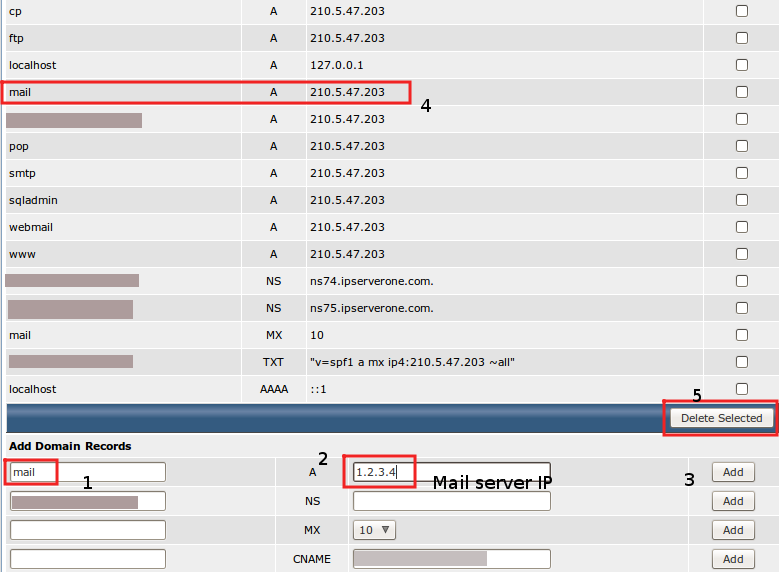
Need to add manually the Dkim record in dns management record as below:

Completed !

How to access phpmyadmin from plesk control panel

$
0
0
Step 1: Login to plesk control panel 
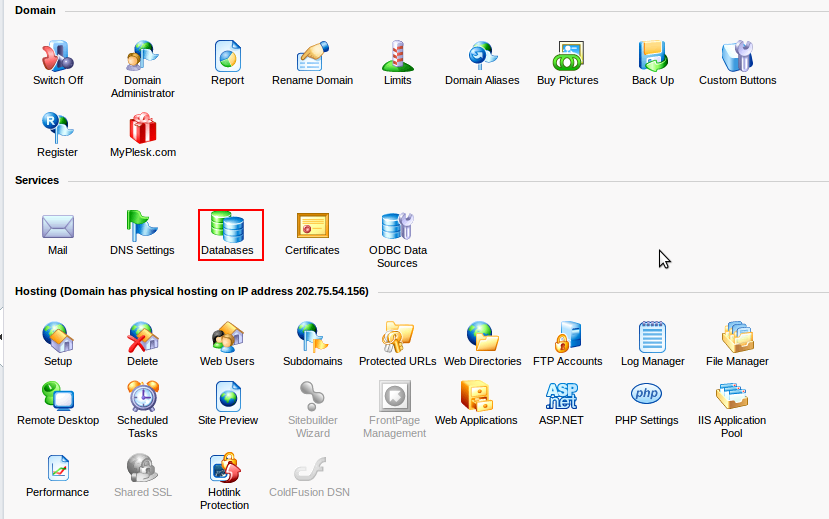
Step 2: Go to Databases 
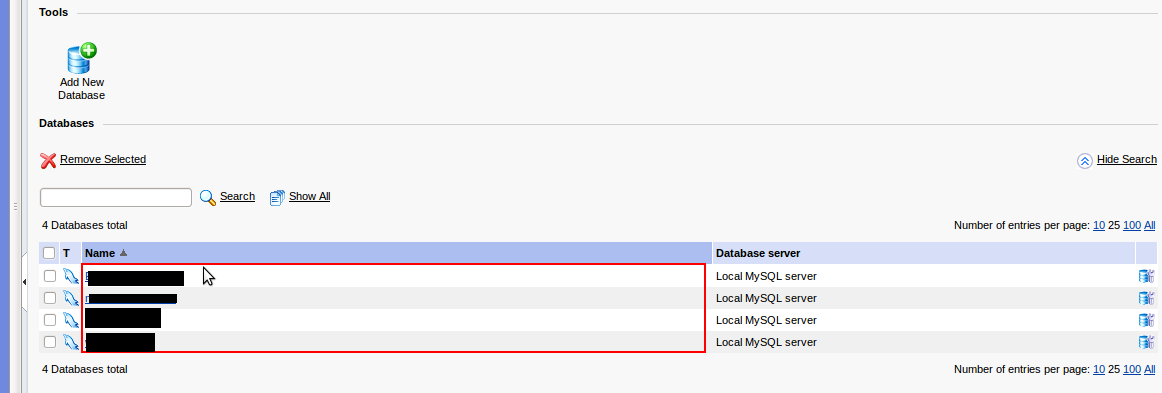
Step 3: Select a database 
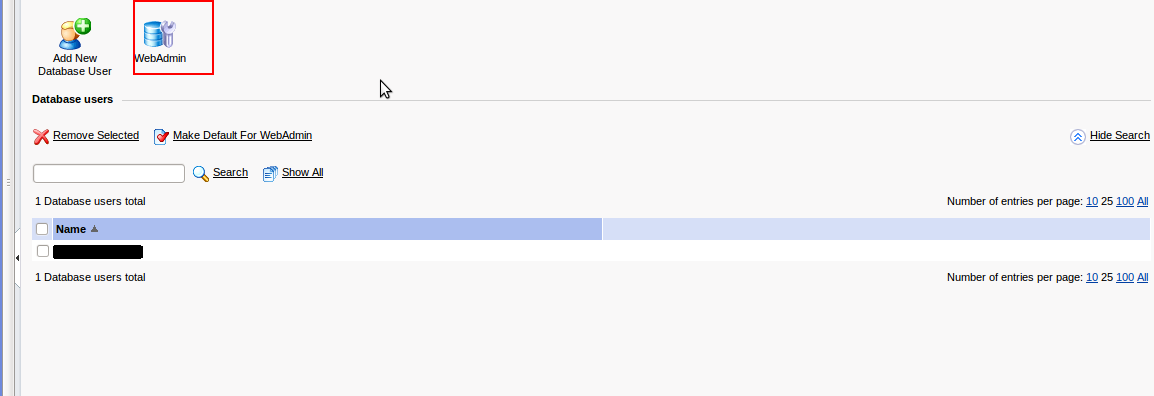
Step 4: Select webadmin

Note: You are already in phpmyadmin

How to disable Local Mail server in direct admin

$
0
0

1)  Login to the direct admin panel :-


2)  After successfully login, click ‘MX Records” under Email Management

3)   Please ‘uncheck‘ box that under Local Mail server, then Click button “SAVE”


How to check Mail Accounts usage in Plesk

$
0
0

1) Login to your Plesk Cpanel, under click Statistics and Click Summary Report

Mail-usage_plesk1


 2) Change from “Summary Report” to “Full Report”

Mail-usage_plesk2


3) Scroll down until you reach “Mail Account” section.

Mail-usage_plesk3

How to add IP in Direct Admin

$
0
0

If you have the administrator access level in direct admin and you need to add extra IP address, here’s the guide for you.

1. Login to control panel using admin access and click on IP Management ip management

2. Insert the new IP address in the column and click Add IP add ip

3. You are also able to assign IP address to reseller. Tick the IP and then choose reseller on the drop down box. After that click Assign to. assign

How to change MX records in Direct Admin

$
0
0

This guide will guide through on how to change MX records in direct admin platform.

1. Login to the direct admin, click on DNS Management dns management

2. Add the IP of the mail server you want at the bottom of the page. After that, delete the existing mail A record.

Step 1: Insert mail in the blank field.

Step 2: Insert mail server IP, e.g: 1.2.3.4

Step 3: Click on “Add” button.

Step 4: Tick on the check box for existing mail A record.

Step 5: Click on “Delete” button.

mail

3. Apply the same setting for webmail A record. So that when user type in webmail.domain.com it will return result.

Step 1: Insert webmail in the blank field.

Step 2: Insert mail server IP, e.g: 1.2.3.4

Step 3: Click on “Add” button.

Step 4: Tick on the check box for existing webmail A record.

Step 5: Click on “Delete” button.

webmail

How to set spamassasin settings in DirectAdmin

$
0
0

DirectAdmin allow you to configure email received by putting those spam detection message. OR rewrite the subject, OR put into the spam folder. Here, we will explain the options one by one:

1. Where do you the spam to go?

Screenshot from 2013-05-15 11:15:27

Inbox (dont’ block it) – you can direct the spam to the inbox as there might be false positive where you need to recheck all those incoming mail

Redirect it to the catch-all spam folder in your main imap account. – if you already set up a spam folder, you may redirect all the spam mail to the spam folder by choosing this option

Send the spam to the appropriate users’s spam folder. – for example if you already create a spam folder to store email from specific email address, you may select this option

Delete the spam – You may also choose to straight away delete the spam where we strongly encourage not to do so as there might be possibility where legitimate email has been tagged as spam

2. What score threshold do you wish to use?

threshold

The description explain it well, usually default setting is low threshold 5.0 and is recommended.

You may set custom threshold but please be cautious as the threshold might or might not block legitimate email

3. Would you like to delete high scoring spam?

Screenshot from 2013-05-15 13:21:59

You can set the spam score by deleting received email if the spam score match the integer you set

The second options was recommended with the false positive as reason

4. Do you wish to rewrite the subject of a spam email?

Screenshot from 2013-05-15 13:30:17

If you choose first option, the spam email received will have “***SPAM***” in front of the email subject. For example: ***SPAM***Fwd: Invoice Number.

For the second option, the email subject will not be changed.

5. How should the spam be delivered?

Screenshot from 2013-05-15 13:37:28

Attachments will seperate the spam into it’s own message, preventing scripts from being run. – if there’s an executable file in the spam email, it will not run if you have select this options

Text-only attachements are used for increased safety. – Attachments including images will not be shown. The email will display text only

For email blacklist and white-list , you may refer to the link: http://www.ipserverone.info/control-panel/how-to-setup-spamassassin-in-DirectAdmin

How to install memcached and libmemcached

$
0
0

1. Install memcached from source

Download the latest source from http://memcached.org/

# cd /usr/src
# wget http://memcached.googlecode.com/files/memcached-1.4.15.tar.gz
# tar xvf memcached-1.4.15.tar.gz
# cd memcached-1.4.15
# ./configure -–with-libevent
# make && make install

Please make sure the libevent & libevent-devel packages has been installed before run ./configure

2. Install libmemcached from source

Download the latest source from http://libmemcached.org/libMemcached.html

# wget https://launchpad.net/libmemcached/1.0/1.0.17/+download/libmemcached-1.0.17.tar.gz
# tar xvf libmemcached-1.0.17.tar.gz
# cd libmemcached-1.0.17
# ./configure
# make & make install

3. Start the memcached as daemon process

# memcached -d -u nobody -m 1048 -p 11211 127.0.0.1

To make sure the memcached is automatically running after server has rebooted, run

# vim /etc/rc.d/rc.local
// add this line
memcached -d -u nobody -m 1048 -p 11211 127.0.0.1

4. Install the Memcache PECL Extension for PHP

# pecl install memcache

Add the extension in php.ini

# vim /usr/local/lib/php.ini
// add this line
extension=memcache.so

restart the httpd service

# /etc/init.d/httpd restart

5. Verify the memcached using php and libmemcached

Create new .php file and add the codes as below

<?php
    $memcache = new Memcache;
    $memcache->connect("localhost",11211); # You might need to set "localhost" to "127.0.0.1"

    echo "Server's version: " . $memcache->getVersion() . "<br />\n";
 
    $tmp_object = new stdClass;
    $tmp_object->str_attr = "test";
    $tmp_object->int_attr = 123;
 
    $memcache->set("key",$tmp_object,false,10);
    echo "Store data in the cache (data will expire in 10 seconds)<br />\n";
 
    echo "Data from the cache:<br />\n";
    var_dump($memcache->get("key"));
?>

or else, run

# strace -p `pidof memcached`

reference http://goo.gl/Fds40


How to install mod_pagespeed on Apache – DirectAdmin

$
0
0
# cd /root
# rpm -i --nodeps mod-pagespeed-stable_current_x86_64.rpm
# yum install at wget https://dl-ssl.google.com/dl/linux/direct/mod-pagespeed-stable_current_x86_64.rpm -y
# vim /etc/httpd/conf/extra/httpd-includes.conf

Add this line

#Google PageSpeed Module
Include /etc/httpd/conf.d/pagespeed.conf
# vim /etc/httpd/conf/httpd.conf

Remove or comment ‘#’

# Deflate module settings
# Include conf/extra/httpd-deflate.conf

Restart the httpd service

# /etc/init.d/httpd restart

To make sure the pagespeed is running,

# apachectl -t -D DUMP_MODULES
core_module (static)
 authn_file_module (static)
 authn_dbm_module (static)
 authn_anon_module (static)
 authn_dbd_module (static)
 authn_socache_module (static)
 authn_core_module (static)
 authz_host_module (static)
 authz_groupfile_module (static)
 authz_user_module (static)
 authz_dbm_module (static)
 authz_owner_module (static)
 authz_dbd_module (static)
 authz_core_module (static)
 access_compat_module (static)
 auth_basic_module (static)
 auth_form_module (static)
 auth_digest_module (static)
 allowmethods_module (static)
 file_cache_module (static)
 cache_module (static)
 cache_disk_module (static)
 socache_shmcb_module (static)
 socache_dbm_module (static)
 socache_memcache_module (static)
 so_module (static)
 dbd_module (static)
 dumpio_module (static)
 buffer_module (static)
 ratelimit_module (static)
 reqtimeout_module (static)
 ext_filter_module (static)
 request_module (static)
 include_module (static)
 filter_module (static)
 substitute_module (static)
 sed_module (static)
 deflate_module (static)
 http_module (static)
 mime_module (static)
 log_config_module (static)
 log_debug_module (static)
 logio_module (static)
 env_module (static)
 expires_module (static)
 headers_module (static)
 unique_id_module (static)
 setenvif_module (static)
 version_module (static)
 remoteip_module (static)
 proxy_module (static)
 proxy_connect_module (static)
 proxy_ftp_module (static)
 proxy_http_module (static)
 proxy_fcgi_module (static)
 proxy_scgi_module (static)
 proxy_ajp_module (static)
 proxy_balancer_module (static)
 proxy_express_module (static)
 session_module (static)
 session_cookie_module (static)
 session_dbd_module (static)
 slotmem_shm_module (static)
 ssl_module (static)
 lbmethod_byrequests_module (static)
 lbmethod_bytraffic_module (static)
 lbmethod_bybusyness_module (static)
 lbmethod_heartbeat_module (static)
 unixd_module (static)
 dav_module (static)
 status_module (static)
 autoindex_module (static)
 info_module (static)
 suexec_module (static)
 cgi_module (static)
 dav_fs_module (static)
 dav_lock_module (static)
 vhost_alias_module (static)
 negotiation_module (static)
 dir_module (static)
 actions_module (static)
 speling_module (static)
 userdir_module (static)
 alias_module (static)
 rewrite_module (static)
 mpm_prefork_module (shared)
 php5_module (shared)
 pagespeed_module (shared)

How to fix Error in processing 451 temporary local problem – SquirellMail

$
0
0

ERROR:  Message not sent. Server replied:

Requested action aborted: error in processing
451 Temporary local problem – please try later

————————————————————————-

Solution:

vi /etc/clamd.conf
look for LocalSocket, uncomment it so it becomes:

LocalSocket /tmp/clamd

then restart clamav:

[root@sample]# /etc/init.d/clamd restart
Starting clamd daemon: /usr/local/sbin/clamd
Starting freshclam daemon: /usr/local/bin/freshclam -d -c 6

*Retry back to do the email transaction.

How to update my application using Installatron

$
0
0
From time to time you might receive email notification such as:

This is an automated email from Installatron.

New versions of an application you have installed using Installatron are now available for upgrade. The following software can be upgraded:
- WordPress @ http://www.ipserverone.com

Or you see the following in Directadmin control panel:

installatron01

Please DO proceed to update your application to latest version as soon as its available, it would help to protect your application from being defaced / hacked, to update:

1. Click on the application at Directadmin control panel home page:

installatron02

2. Click on the Upgrade button:

installatron03

3. Make sure you have choose to make a backup copy, then click on the Upgrade button at the bottom of the page

installatron04

4. Installatron will then backup and upgrade the application for you automatically.

How to update total disk space in direct admin

$
0
0

1)   Login to the Direct Admin panel :-

2)   At the Main page under ‘Your Account’ – click ‘Site Summary / Statistics / Logs’

Screenshot from 2013-06-28 10:17:06


3)   Go under the ‘setting’ option, click button ‘update’ as picture below :-

Screenshot from 2013-06-28 10:17:00

Please wait until the update finish successful

Installatron – Error: Bytecode loader failed. See troubleshooting for detail

$
0
0
If you are getting the following Error message in your Installatron Application Installer:

Error: Bytecode loader failed. See troubleshooting for detail

The Installatron application will need to be repaired, just SSH to your server and run the following command:

/usr/local/installatron/repair --stable

Wait for the repair process to be completed and it should fix the issue

How to view and change the bandwidth limit in Direct Admin

$
0
0

This guide is only applicable for those who’s in dedicated hosting environment or those with Direct Admin’s admin login password. You can modify the user bandwidth usage accordingly.

1. Login to your Direct Admin. login

2. Insert the domain you want to view the bandwidth in the search column search

3. Search result will be shown as image, click into the user. show user

4. You will be able to view the bandwidth from here. view bandwidth

5. If you need to edit the user bandwidth, click “Modify user” modify user

6. Edit the user bandwidth by key in the value, the measurement is in Megabytes. moidfy bandwidth

7. Click “Save” at the bottom. Then the user bandwidth will be modify.

How to configure roundcube webmail folder for directadmin email account

$
0
0

In order for the roundcube to work correctly with directadmin control panel, there’s several things need to be done.

First will be to configure roundcube default folders settings,

1.) Open the roundcube config file which located at WEBMAIL_DIR/config/main.inc.php

2.) Change the line for the default folder as below:

$rcmail_config['drafts_mbox'] = ‘Drafts’;

And change to..

$rcmail_config['drafts_mbox'] = ‘INBOX.Drafts’;

3.) Do the same for spam, Sent, and Trash folder.

4.) Next, you are require to configure the folder display array, which may referring to below:

$rcmail_config['default_folders'] = array(‘INBOX’, ‘INBOX.Drafts’, ‘INBOX.Sent’, ‘INBOX.spam’, ‘INBOX.Trash’);

5.) And also make sure to enable the default folder creation referring to below line.

$rcmail_config['create_default_folders'] = true;


How to enable Roundcube webmail Password Change plugin

$
0
0

By default the Roundcube webmail should come with the plugin that allow user to change password which compatible with Directadmin control panel.

1.) First to enable the plugin feature, first edit the Roundcube webmail main configuration file, add the plugin name into the plugin array settings by looking for the line below:

$rcmail_config['plugins'] = array();

Add the plugin name into the array bracket as below:

$rcmail_config['plugins'] = array(password);

2.) Make sure the plugin folder is in place and with the correct name. ( WEBMAIL_DIR/plugins/password/ )

3.) Next, edit the password change plugin settings ( WEBMAIL_DIR/plugins/password/config.inc.php ).

4.) Change the driver settings of the plugin referring to below:

$rcmail_config['password_driver'] = ‘sql‘;

Change to:

$rcmail_config['password_driver'] = ‘directadmin‘;

5.) Then, if the directadmin requires SSL, look for below line and edit it.

$rcmail_config['password_directadmin_host'] = ‘tcp://localhost‘;

Change to:

$rcmail_config['password_directadmin_host'] = ‘ssl://localhost‘;

How to solve Plesk Windows domain not working DNS zone disappears

$
0
0

Symptoms

1. Domain name DNS zone file record in Plesk Windows suddenly not working.

2. DNS zone file missing at Plesk DNS zone folder(C:\Program Files (x86)\Parallels\Plesk\dns\var).

3. Login to Plesk, restore default also not working.

Reason

The issue is caused by incorrect dns details in Plesk database.

Solution

Steps to recreate dns records

1. Search invalid dns records in Plesk database

cd C:\Program Files (x86)\Parallels\Plesk\admin\bin>
"%plesk_bin%\dbclient" --direct-sql --sql="select id,name from dns_zone where id not in (select dns_zone_id from domains) and id not in (select dns_zone_id from domain_aliases) and id <> (select val from misc where param = 'default_dns_zone_id')"

2. Remove invalid dns records

cd %plesk_dir%\Mysql\bin

Login plesk mysql:

mysql -uadmin -p -P 8306 psa

Delete records: delete from dns_zone where id not in (select dns_zone_id from domains) and id not in (select dns_zone_id from domain_aliases) and id <> (select val from misc where param = ‘default_dns_zone_id’);

delete * from dns_zone where id=101;

Exit mysql

3. Update dns recods

cd C:\Program Files (x86)\Parallels\Plesk\admin\bin>
DNSMng.exe Update *

Login Plesk panel, use Restore Defaults to restore default dns records

Open DNS manager on server to check if correct dns records are created.

How to create auto responder for webmail

$
0
0

1. At the email login page, click on the “change password” click on change

2. You will be redirect to a new page, kindly login with the same email login for username and password. control linlk

3. You may choose to reset email password (1) or set vacation message a.k.a auto responder (2) vacation

4. Set your auto reply message at the vacation message box, you may choose when to start and auto reply ending date. Click on “Set vacation message”. message

5. If you want to cancel the auto responder, just click on the “Delete current Vacation Messages” Screenshot from 2013-09-11 11:45:50

note: You might need to update the vacation messages if you found that you did not get the auto reply

How to create database in Plesk Control Panel

$
0
0

1. Login into your plesk, click on the “Databases” Icon.

plesk_db

2. Click on “Add new database”.

plesk_db2

3. Select Database type to create. Please refer to your software manual/refer to your web developer which database type should be created.

plesk_db3

4. After the database successfully created, you will need to add a new database user to the created database.

plesk_db4

5. Type in the necessary information for every column. And click OK to finish the database user creation process.

plesk_db5

Now the database is created with a username which is able to access to it.

How to activate SSL in SME hosting using Globalsign OnelickSSL

$
0
0

1. Login to your SME hosting, click on “GlobalSign OneclickSSL Installer”.

ssl_one

2. First, select the hostname that will be install SSL, and then insert the voucher code you received from IPserverone, next, insert the email address that will receive any SSL cert news and update. After everything inserted, click “Activate SSL” to activate the SSL.

ssl_one2

3. Wait until the process done, and your SSL will be installed.

ssl_one3

Viewing all 144 articles
Browse latest View live